Access your homelab from anywhere with a YubiKey and mutual TLS

Carl Tashian
device-attest-01 challenge type, and a client certificate for mutual TLS.
While that sounds like a lot, the result is simple and easy to use in any browser, from anywhere.
Background
First, let’s define all of those terms above:
-
Mutual TLS is how we’re going to access the homelab. Mutual TLS is two-way TLS authentication: the client and server both have TLS certificates, and they authenticate each other mutually.
In a “normal” (non-”mutual”) TLS connection, the server presents a TLS certificate that the client authenticates. With mutual TLS, the client also presents a client certificate that the server authenticates, proving ownership of the private key associated with the certificate.
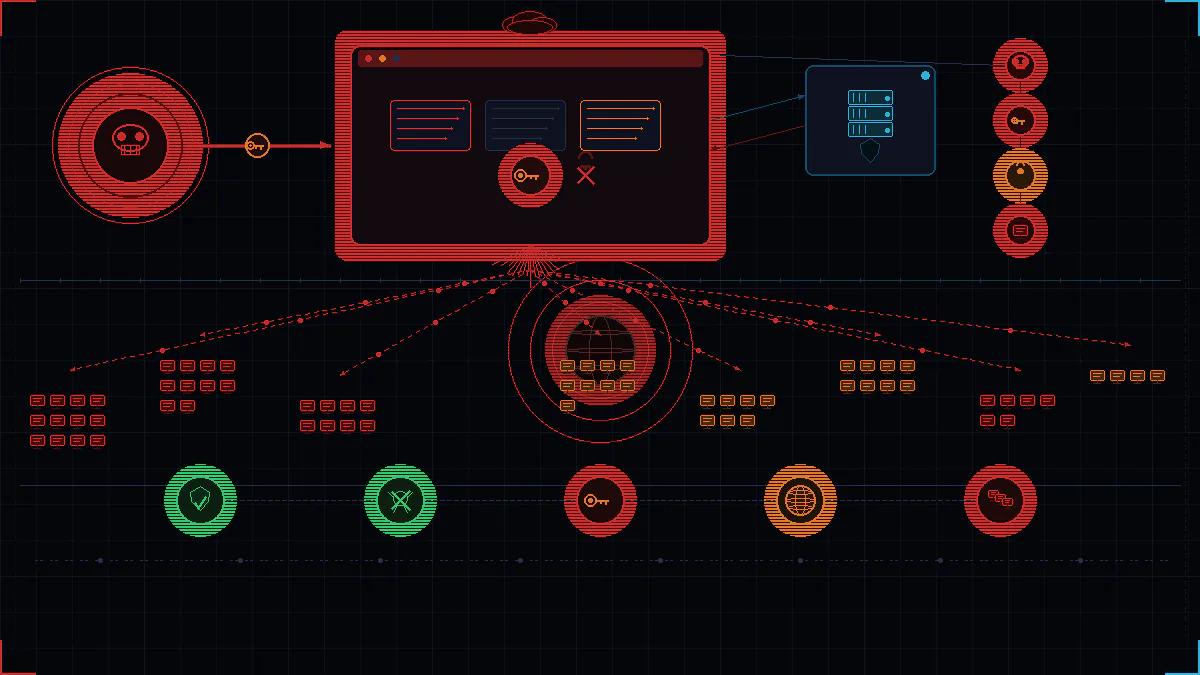
There’s a reason mutual TLS is popular with governments and militaries around the world. If you’re going to expose anything from your homelab on the public internet, a server protected with mutual TLS is a pretty good bet, because the authentication steps happen before a web page can even load. So, you don’t have the giant attack surface that comes with web applications or web forms. Instead, the attack surface of mutual TLS is more similar to that of SSH.
Wikipedia’s page for mutual TLS says:
As it requires provisioning of the certificates to the clients and involves less user-friendly experience, it's rarely used in end-user applications.
CHALLENGE ACCEPTED.
-
Client certificates become even more secure when the associated private key is generated and stored in a hardware device (like a YubiKey) and is not exportable. These hardware-bound keys are private keys that cannot be exported from the device that generated them. These keys can be used, but not stolen. YubiKeys can generate and store several hardware-bound private keys via PIV. Furthermore, YubiKeys can prove to any third party that its private keys are hardware-bound. This proof is documented in an attestation certificate, which we’ll learn more about in this tutorial.
-
ACME is the protocol used by hosts to prove their identity to a Certificate Authority (CA). It’s used by Let’s Encrypt and other public CAs for publicly-trusted certificates, but ACME can also be privately hosted for internal use, and that’s what we’re going to do.
In 2022 the ACME protocol was extended with a device attestation challenge type, calleddevice-attest-01. A trusted device can use its device attestation capabilities to prove its identity to a CA via ACME—as long as the CA trusts the signer of the attestation. For this project, our homelab CA will have a trust relationship with Yubico’s attestation CA.
Prerequisites
For this tutorial, you will need:
- The
ykmanandsteppackages (brew install ykman step) - The
step-kms-plugin—a plugin forstepfor working with external key management hardware and software. - The
caddyweb server will act as our reverse proxy, so install that as well. - Finally, you’ll need a Certificate Authority (CA). Here’s three ways to set one up:
-
Cloud-hosted: You can sign up for a Smallstep Certificate Manager homelab account. It’s free for homelabs with less than 50 endpoints.
-
Self-hosted:
- Install our open source
step-caserver - Initialize your CA by following our Getting Started guide. Be sure to enable remote management by passing
--remote-managementand--address :4443to thestep ca initcommand - Start your CA by running
step-caas a daemon
- Install our open source
-
Self-hosted, on a Raspberry Pi:
The more involved but also very fun and more secure way to self-host a CA is to follow my blog post Build a Tiny Certificate Authority For Your Homelab. This post uses YubiKey PIV to secure the signing keys for your CA, instead of storing them on disk.
-
Once you have your CA in place, we can dive in on the project.
Let’s Explore YubiKey PIV
PIV is an application on the YubiKey that gives it smart card capabilities. Smart cards typically have a few slots where TLS/X.509 certificates and private keys can be secured. YubiKey’s PIV application can generate hardware-bound (non-exportable) private keys and Certificate Signing Requests (CSRs) for those keys. The primary key slots are labelled9a through 9d.
Web browser can use the PIV certificates and associated private keys in slot 9a to authenticate the user to websites that use mutual TLS.
Let’s explore the PIV functionality of the YubiKey, so you can get a sense of what’s happening under the hood.
Start by inserting a YubiKey and generating a private key in slot9a:
You’ll get a PEM of the associated public key as output:
The private key you just generated is a hardware-bound key. It cannot be exported from the YubiKey, so it can only be used by the system when the YubiKey is present (and, usually, only after typing the YubiKey’s PIN).
Next, let’s get an attestation certificate from the YubiKey.
An attestation is a digitally signed document that proves something to a third party. As long as you trust the signer, you can trust the attestation.
X.509 certificates are a great format for attestation documents. For this project, we’ll be taking advantage of an X.509 attestation certificate produced by the YubiKey. The attestation certificate is signed by an internal CA on the YubiKey (the “attestation CA”), and it allows any third party to verify both the residency and the security policy of the associated private key.
Let’s take a look at it. Run:
(No output.)
Now run:
This certificate has some interesting properties:
-
It's signed by an internal CA that resides on the YubiKey, called Yubico PIV Attestation.
-
It's bound to the public portion of the key stored in slot
9a -
It has some nice extensions that describe the YubiKey itself—including its unique serial number—and the key policy for the private key.
-
It confirms that the private key is hardware-bound and non-exportable.
Crucially, the YubiKey will only attest a private key that's been generated directly on the YubiKey. If you try to attest an imported private key, it will fail:
$ ykman piv keys import 9a my_special_key.pem $ ykman piv keys attest 9a - > attest.crt ERROR: Attestation failed.
Let’s verify the authenticity of this attestation certificate. We can verify it by constructing a full certificate chain that connects to Yubico’s PIV attestation root CA, which is published on Yubico’s website. Run:
There’s also an attestation CA—the CA that resides on your YubiKey, and it acts as the intermediary between the attestation certificate and the Yubico root CA.
The attestation CA is stored in a special certificate slot,f9. Run:
$ ykman piv certificates export f9 yubico-intermediate.crt $ step certificate inspect yubico-intermediate.crt --short X.509v3 Intermediate CA Certificate (RSA 2048) [Serial: 1048...5072] Subject: Yubico PIV Attestation Issuer: Yubico PIV Root CA Serial 263751 Valid from: 2016-03-14T00:00:00Z to: 2052-04-17T00:00:00Z
Now we have everything we need to verify the attestation certificate:
Configuring your CA for device attestation
The next step is to get your CA server configured to authorize ACME requests from your YubiKey.
Once you’re up and running with your own Tiny CA or a Certificate Manager account, you’ll need to configure it for device attestation.
For that, let’s add an ACME device attestation provisioner:
Adding CA issuance policies
By default, your CA trusts and will issue certificates to any YubiKey via the ACME device attestation challenge. To constraint this further, you’ll want to add a CA policy with your specific YubiKey serial numbers.
-
If you're using
step-ca: We need to add an initial policy that will allow you to continue to administer the CA. The default administrative username isstep, so we'll add a policy that allows it:$ step ca policy authority x509 allow dns step
-
If you're using Certificate Manager: We need to add an initial policy that will allow you to continue to administer the CA. The default administrative username is your email address, so we'll add a policy that allows it:
$ step ca policy authority x509 allow email carl@smallstep.com
Now we can add “allow” policies for the YubiKey serial numbers we have:
The serial number is printed on the YubiKey and is shown in the output of
ykman info.
If you also use this CA for host or user certificates in your homelab, you’re going to also want allow policies for those. For example, you may want wildcard policies for your homelab domains. My homelab domain for this tutorial is lab.step.toys, so I’ll add a policy for that:
Now I have the following policy configuration when I run
step ca policy authority view:
"x509": { "allow": { "dns": [ "step", "*.lab.step.toys", "15903754", "13013821" ] }, "deny": {}, "allowWildcardNames": true }
Testing it out
Now we’re going to generate a key pair and get a certificate signed by the CA to store on the YubiKey. This is where we put device attestation into practice.
Generate a private key in the key slot9a on the YubiKey:
The public portion of the key will be output:
Next, use ACME device attestation to get a certificate for the key pair you just generated. Note that you may need to touch your YubiKey to sign the ACME challenge response when running this command:
Output:
Now import the signed certificate back into your Yubikey, in the certificate slot
9a:
Finally, let’s confirm the certificate we just imported:
You’re ready to go! You have a certificate that lasts one day. By default,
step-ca issues certificates with a 24-hour validity period, but you can extend that in your CA configuration.
Configuring Caddy
Now let’s set up our Caddy server.
Here’s my/etc/caddy/Caddyfile, for my homelab server where I want to require mutual TLS:
Some important points here:
-
Caddy will get and manage a Let’s Encrypt certificate for my homelab hostname,
carl.lab.step.toys. By using a Let’s Encrypt certificate on the server side of the TLS connection, you won’t need to add your homelab’s root CA to the trust store on your clients. Instead, you’ll be able to plug in your Yubikey and just go. For this to work, your homelab’s hostname will need to be in public DNS. -
If you don’t have a static IP for your homelab, you’ll also need to set up something like Dynamic DNS to update your DNS record when your IP changes. Many home routers will run Dynamic DNS for you.
-
You’ll need to add both your root and intermediate CA certificates to Caddy’s configuration, in a single PEM-encoded certificate bundle. You’ll want the intermediate certificate PEM block first, and the root certificate PEM block second. The order matters!
$ step ca root > root.crt $ step certificate inspect https://tinyca.lab.step.toys:4443 \ --insecure --format pem --bundle | \ awk 'split_after==1{n++;split_after=0} /-----END CERTIFICATE-----/{split_after=1} n==1{print > "intermediate.crt"}' $ cat intermediate.crt root.crt > /etc/caddy/tinyca.crt $ rm intermediate.crt root.crtAs a side note, I spent hours testing and troubleshooting mutual TLS in various web browsers on macOS, with different configurations, in order to figure out what works and what doesn’t. Then I made this handy table:
Yubikey PIV slot contents Caddy v2 trusted_ca_cert_file Chrome 109.0.5414.119 Safari 16.3 Firefox 109.0.1 client in 9a only root CA only no no no client in 9a only intermediate, root yes yes yes client in 9a only root, intermediate no no no client in 9a, intermediate in 9c root CA only no no yes client in 9a, intermediate in 9c intermediate, root yes no yes client in 9a, intermediate in 9c root, intermediate no no yes Note: The root CA does not need to be in macOS trust store for client authentication; only for server authentication.
Testing it out
If you’ve followed along, you should have a web server up and running. Insert your YubiKey, open a browser, and go to your Caddy server. You’ll be presented with a certificate dialog, and you should be able to select your client certificate from the YubiKey. The browser may ask for your YubiKey PIN, as a second factor.
Once you see the “Hello world” message from Caddy, you’re in.
If you’re using iOS, there’s one caveat: Support in mobile Safari requires installing the Yubico Authenticator app first, and enabling its smart card extension. See Yubico’s docs for how to set that up. It’s really satisfying to authenticate with NFC!
Next steps
Proxying your homelab resources through Caddy
The next step is to add reverse proxy configurations to Caddy using the reverse_proxy directive, so you can route different resources from inside your homelab out to the public internet—protected by mutual TLS.
For example, if you want remote desktop access, you could add an Apache Guacamole server to your homelab, configure a reverse proxy pointing to it, and it will be protected with mutual TLS:
https://carl.lab.step.toys { import mTLS_required # Apache Guacamole server running on localhost:8080 reverse_proxy /guacamole/* http://localhost:8080 { flush_interval -1 } }
Caddy’s website has a great tutorial for this, which may involve setting up Dynamic DNS, if you don’t have a static IP address at home.
Adding SSH access
The most straightforward way to add SSH access to your setup is to expose an SSH server directly, and use an SSH-sk type key stored on your YubiKey. We have instructions for setting this up in our SSH Tips and Tricks post.
Getting certificates for people or hosts
What if I want to issue certificates bound to a person's identity — likecarl@smallstep.com — instead of (or in addition to) the YubiKey's permanent identifier? With step-ca, you can do that using our webhooks feature. Mariano Cano wrote a sqlite-backed webhook server for step-ca that you can use to map your users to YubiKey IDs, and to restrict issuance. The repository has full setup documentation, but just remember: You'd use this webhook server in lieu of a CA policy.
With Certificate Manager, you can get certificates for people by using an inventory.
Exposing your CA to the internet
This section applies to self-hosted CAs. Certificate Manager CAs are already exposed to the internet.
Now that everything is set up, we have two options for how to use our ACME server:
- If we want to get a certificate for one of our Yubikey from anywhere in the world, we need to expose our ACME server to the internet.
- Or, we can keep it as an internal ACME server for our homelab, and issue longer-lived certificates for our YubiKey. To do this, extend the default validity period in your CA configuration. Normally, here at Smallstep we are big fans of short-lived certificates. But in this case, when when the private key is hardware-bound, longer-lived certs are much more palatable.
If you decide to expose your ACME endpoints to the internet, here’s how to do it.
First, add a domain for the CA to DNS, pointing to the homelab. For me it’stinyca.lab.step.toys.
Next, we’ll rename our ACME provisioner to turn it into a “secret link” rather than its current, guessable value. Run the following:
{ PROVISIONER_NAME=$(< /dev/urandom LC_ALL=C tr -dc A-Za-z0-9 | head -c80) step ca provisioner update acme-da --name $PROVISIONER_NAME echo https://tinyca.lab.step.toys/acme/$PROVISIONER_NAME/directory }
This will output the URL that you’ll use from outside of your homelab to get a certificate:
Now we’ll configure Caddy to proxy the CA traffic necessary for a client from the internet to bootstrap and enroll using ACME device attestation. Append the following to
Caddyfile:
https://tinyca.lab.step.toys { @ca { path /root/* path /acme/* } handle @ca { reverse_proxy https://127.0.0.1:4443 { # backend TLS connection transport http { tls_trusted_ca_certs /etc/caddy/root_ca.crt } } } # frontend TLS connection tls { issuer acme { dir https://127.0.0.1:4443/acme/a8pk0gy1IJYIyiRhFNSYL6DWpgbPsLkeMhS9GFruUTaH6Ra9vsZOalLuxsIyNpd6ZzetY08BQpgfFo5x/directory email carl@smallstep.com trusted_roots /etc/caddy/root_ca.crt disable_tlsalpn_challenge } } }
Getting a certificate while on the road
Finally, lets get a certificate from outside of the homelab:
$ step ca certificate --attestation-uri 'yubikey:slot-id=9a' \ --kms 'yubikey:?pin-value=123456' \ --acme https://tinyca.lab.step.toys/acme/a8pk0gy1IJYIyiRhFNSYL6DWpgbPsLkeMhS9GFruUTaH6Ra9vsZOalLuxsIyNpd6ZzetY08BQpgfFo5x/directory \ 15903754 15903754.crt
And then drop them into the YubiKey:
Why not just use Wireguard or Tailscale for homelab access?
Tailscale and Wireguard networks work best when their software is installed on all of the devices and VMs in your homelab. Maybe you don’t want that. The Mutual TLS approach in this post only requires a single HTTPS proxy server that’s exposed through your router.
Carl Tashian (Website, LinkedIn) is an engineer, writer, exec coach, and startup all-rounder. He's currently an Offroad Engineer at Smallstep. He co-founded and built the engineering team at Trove, and he wrote the code that opens your Zipcar. He lives in San Francisco with his wife Siobhan and he loves to play the modular synthesizer 🎛️🎚️