Microsoft Entra ID Quickstart
Prerequisites
You will need:
- An account on the Smallstep platform. Need one? Register here
- An Azure Premium edition account (P1 or higher)
- Global administrator access to the account
Features
The following provisioning features are supported:
- Push Groups and New Users
- Push Profile or Group Updates
- Push User Deactivation
- Reactivate Users
Overview
- Create Groups in Microsoft Entra ID
- Tell us your directory's Tenant ID
- Add the Smallstep SSH Azure Enterprise Application to your tenant
- Enable user provisioning (SCIM) in Azure
- Check logs to confirm users and groups are syncing to Smallstep SSH
Step by step instructions
Step 1. Create groups
You'll grant access to your hosts via Active Directory Groups. If you don't already have groups set up, you'll want to create a group for each kind of user access to your servers. For example, you might have a group for ssh users, and one for sudo users.
In the Azure portal, start at the Groups blade.
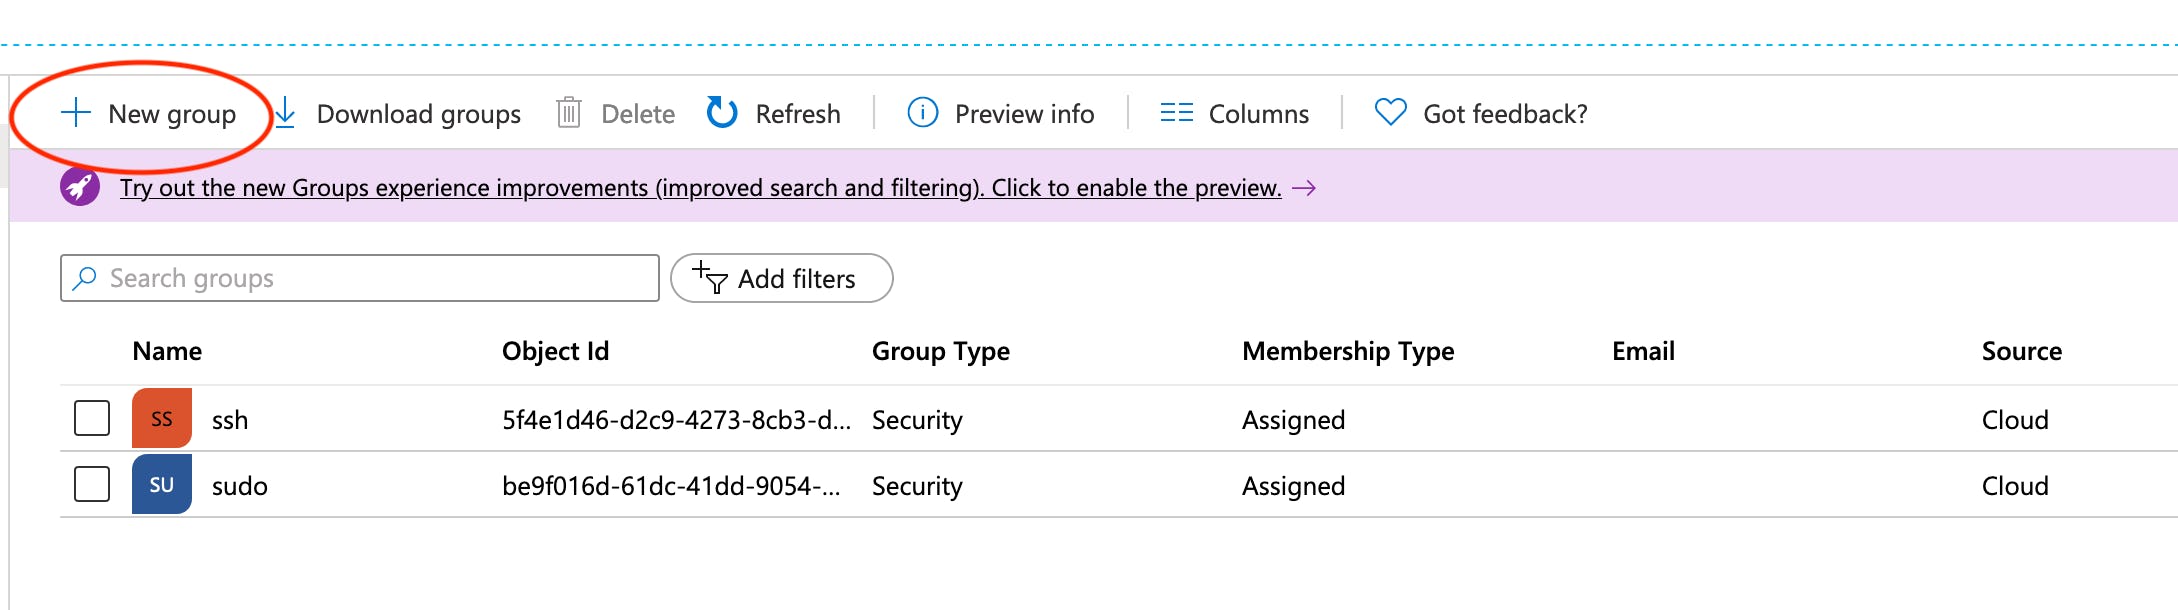
When creating your groups, give them names and accept the defaults on all other settings.
Step 2. Tell us your directory's tenant ID
-
In the Smallstep SSH console, under the Users tab, choose Azure.
-
Paste your Tenant ID from the Active Directory Overview blade into the "Add Your Team" dialog:
-
Choose Save.
Step 3. Add the Smallstep SSH Azure enterprise application
Sign in to Smallstep SSH
-
Sign in to Smallstep at
https://smallstep.com/app/[Team ID] -
Follow the Getting Started workflow.
-
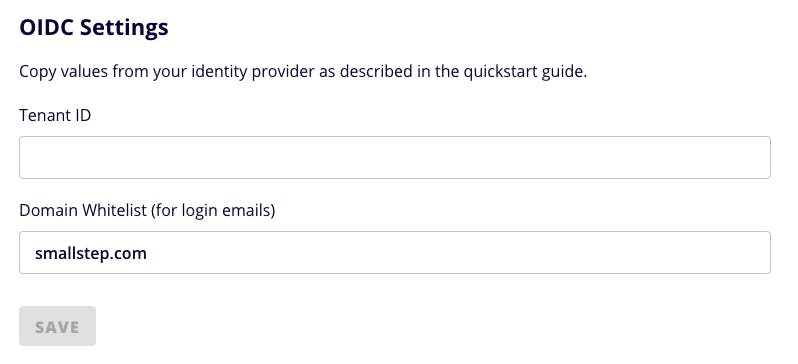
Choose the Users tab, and choose Microsoft Entra ID as your identity provider.
-
Enter your Tenant ID and Whitelisted Domains, and Save.
-
Now run
step ssh login your@email. Your browser will open to an Entra ID single sign-on flow, and you'll be prompted to add the Smallstep SSH enterprise application to your tenant.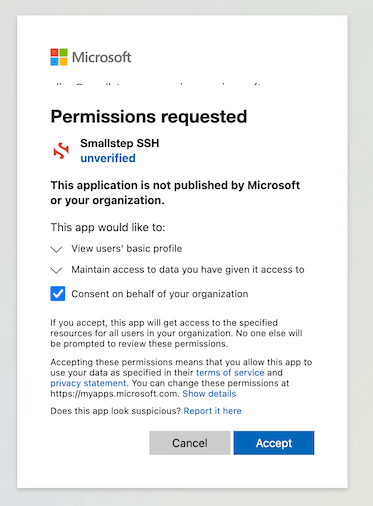
-
Choose Consent on behalf of your organization.
-
Accept the application for your tenant, and finish the sign-on flow.
🤦♂️ If you encounter "The username may be incorrect", you'll need to use a different account to accept the application into your tenant. Specifically, you cannot use a Microsoft Account or a Guest account; the account must be an Entra ID account.
Assign groups to your application
In the Azure Portal Enterprise Applications blade, you should now see Smallstep SSH. Open it.
Choose Users and Groups on the left:
- Go to + Add User to create a new assignment.
- Select the groups you created in Step 1.
- Choose Select on the bottom right.
- Choose Assign on the bottom left.
Your Users and Groups list should now look something like this:

Step 4. Enable user provisioning (SCIM) in Azure
- Choose Provisioning on the left and choose Get Started.
- Set the provisioning mode to Automatic.
- Expand Admin Credentials:
- Supply the SCIM Tenant URL and Secret Token from the Smallstep console.
- Choose Test Connection and make sure that it works.
- Save.
Alternative
userNameAttribute MappingsThe
userNameattribute determines the name of the POSIX account that will be created when users connect to a host. By default, the expression returns the everything before the@in the UPN, converted to lowercase:Here are some alternative UPN expressions that have been useful to customers:
Remove dots
.from usernamesSome users have dotted UPNs, and POSIX usernames without dots. Linux usernames with
.in them are POSIX-compliant (IEEE Std 1003.1-2017, section 3.437) and in practice dotted usernames work fine on many systems. If your UPNs contain dots, you can configure theuserNameattribute mapping to remove them. Use the following expression for youruserNameattribute:Convert
bill.gates@microsoft.comtobgates:ToLower(Replace(Replace([userPrincipalName], , "(?<=^.{1}).\w+.\.", "", "", , ), , "(@(.)*)","","" , ,))
Turn on provisioning
- Save your settings and return to the Provisioning panel.
- Choose Start Provisioning.
🤦♂️ There's a quirk in Microsoft's UI here, and you may see an error when saving after turning provisioning on. If so, wait 60 seconds and try Save again.
Step 5. Confirm the directory connection
Return to the Smallstep console.
-
Navigate to the LOGS menu. You should see a list of success messages assocated with
SCIM-SYNCcatagory items.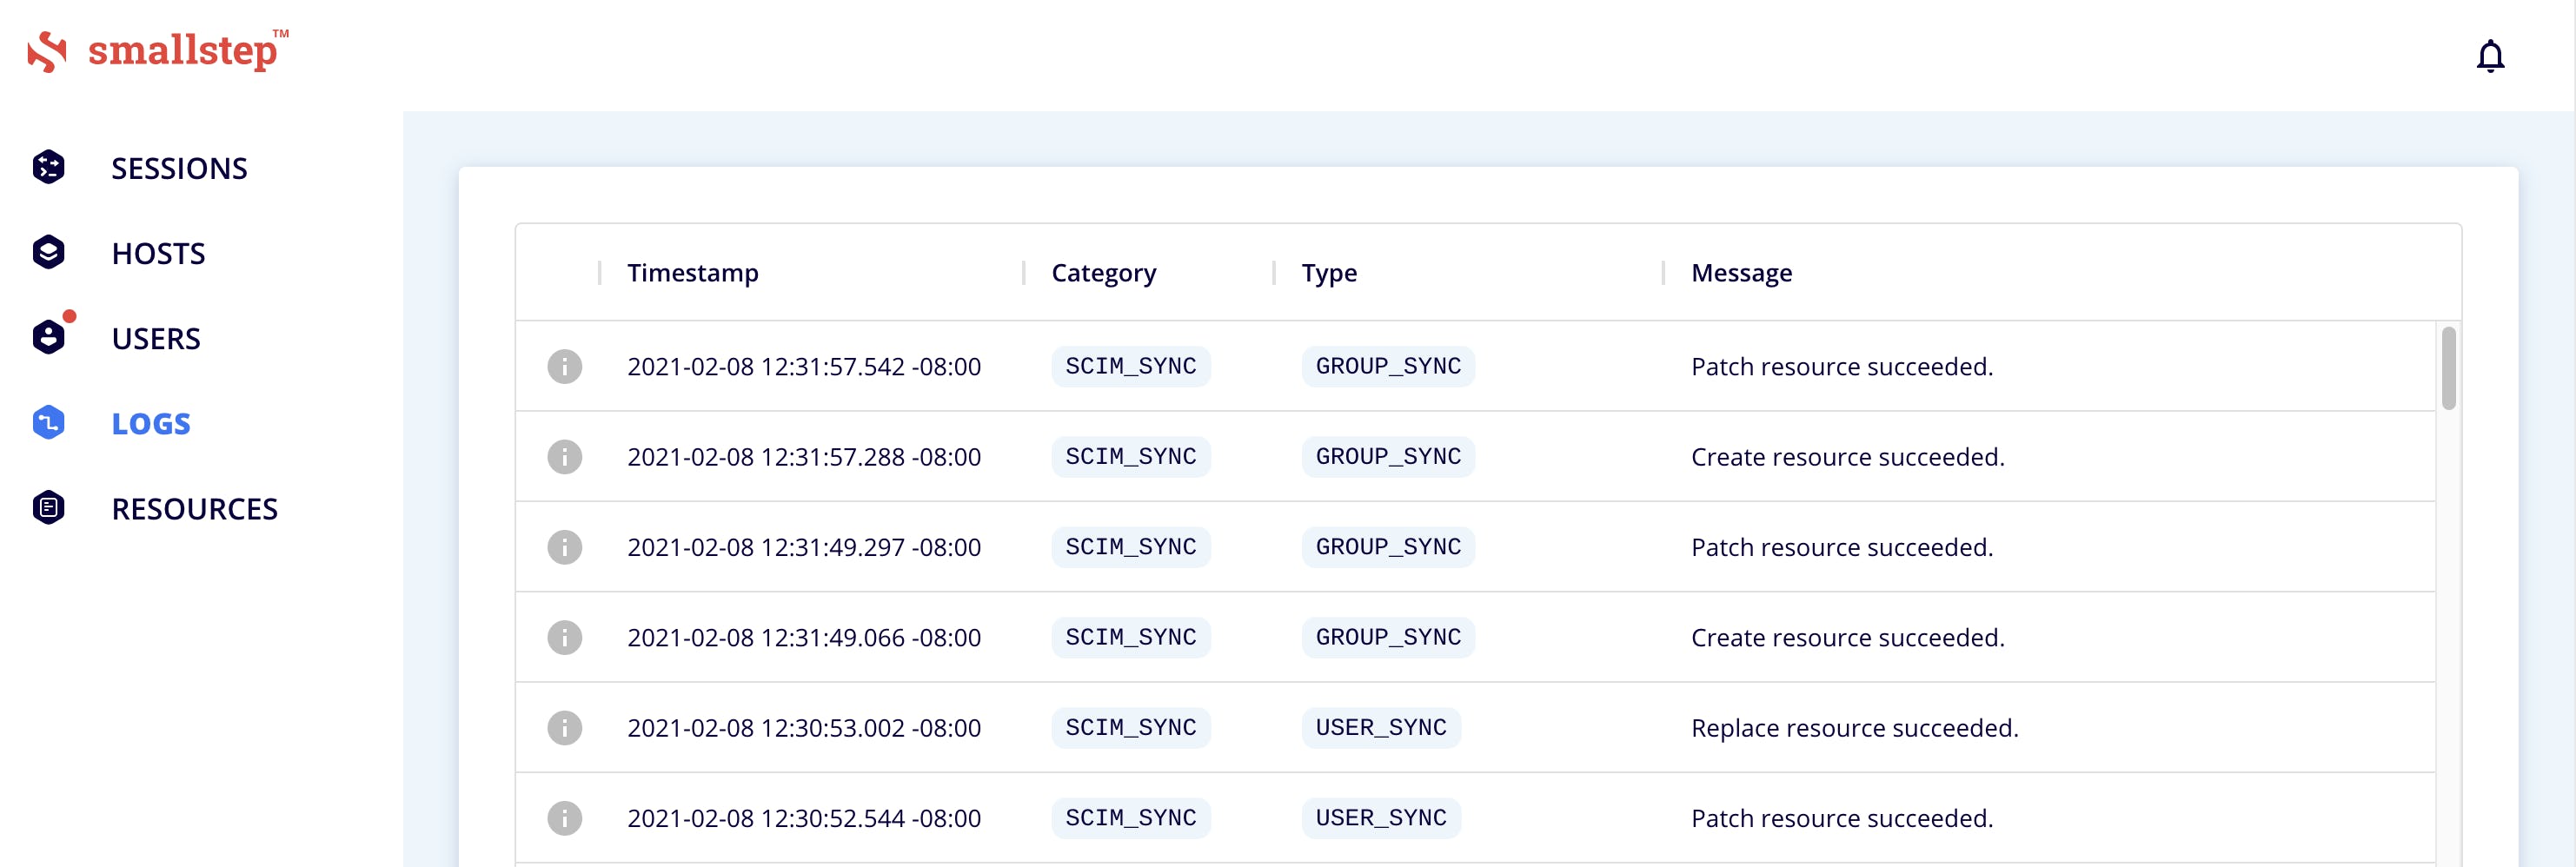
-
Navigate to the USERS menu. If the onboarding dialog is open, press
Escto close. -
You should see your Users and Groups synced over from Entra ID.
Don't see your users and groups? Microsoft's SCIM service may add a 40-minute delay after you set it up. You can force an update by clicking Restart provisioning in the Provisioning panel. Even then, it may take a minute to sync with Smallstep.
Entra ID configuration complete
Troubleshooting tips
- Initial activation of Entra ID OIDC provisioning in Smallstep SSH requires entering your Application (client) ID, Client secret, and Configuration Endpoint into the Smallstep UI. Contact Smallstep support with any questions | support@smallstep.com
- Note: When users are deactivated in Entra ID, they will be deactivated in Smallstep. Users will not be able to SSH to servers, but their user accounts will remain on Smallstep managed hosts. To permanently delete user data on Smallstep managed hosts, contact Smallstep support | support@smallstep.com
Last updated on February 3, 2026
Introducing
Device Identity
Ensure that only company-owned devices can access your enterprise's most sensitive resources.